| 概要 | |
|---|---|
| 目的 | Dockerによる環境構築 Part 2: サンプルアプリケーションを動かしてみる。 |
| 関連記事 | Ubuntu Desktop環境構築 Part 14 |
| 参考 | Docker docs: Sample application |
1. Node.jsを活用したtodo listマネジャーアプリの作成
MVP (minimum viable product)としてNode.jsを活用したtodo listマネジャーアプリの挙動をお披露目したいとします。
アプリソースコードの入手
こちらのレポジトリからソースコードを入手します。zip fileでダウロードしても良いですが今回はgit cloneで/appディレクトリのみcloneします。
まずworking directoryを作成と設定します。
1
2
3
% mkdir sample_app && cd sample_app
% git init
% git config core.sparsecheckout true
リモートレポジトリの登録とサブディレクトリの取得を実施します。
1
2
3
4
% git remote add origin git@github.com:docker/getting-started
% echo app/ > .git/info/sparse-checkout
% git pull origin master
% cd ./app
container imageのビルド
まずDockerfileを作成します。
1
2
3
4
5
FROM node:12-alpine
WORKDIR /app
COPY . .
RUN yarn install --production
CMD ["node", "src/index.js"]
つぎにコンテナイメージのビルドを実行します。
1
2
3
4
5
6
7
8
9
10
11
12
13
14
15
16
17
18
19
20
21
22
23
24
25
26
27
28
29
30
31
32
33
34
35
% docker build -t getting-started .
Sending build context to Docker daemon  4.659MB
Step 1/5 : FROM node:12-alpine
12-alpine: Pulling from library/node
e95f33c60a64: Pull complete
fdb0a3f5f08b: Pull complete
f4587ca7dc77: Pull complete
b0657687f782: Pull complete
Digest: sha256:5d8b181a0738654bbe659a68879298f8d2d4256685282ee1c2330d97c33e3eee
Status: Downloaded newer image for node:12-alpine
 ---> 5c6db76c80d7
Step 2/5 : WORKDIR /app
 ---> Running in 6c20d67238ec
Removing intermediate container 6c20d67238ec
 ---> c1ccf4545758
Step 3/5 : COPY . .
 ---> 24aafec39d0d
Step 4/5 : RUN yarn install --production
 ---> Running in 423e1312204b
yarn install v1.22.5
[1/4] Resolving packages...
[2/4] Fetching packages...
info fsevents@1.2.9: The platform "linux" is incompatible with this module.
info "fsevents@1.2.9" is an optional dependency and failed compatibility check. Excluding it from installation.
[3/4] Linking dependencies...
[4/4] Building fresh packages...
Done in 12.38s.
Removing intermediate container 423e1312204b
 ---> c75cc24d32b7
Step 5/5 : CMD ["node", "src/index.js"]
 ---> Running in d52748593cf0
Removing intermediate container d52748593cf0
 ---> 4d83f78bd171
Successfully built 4d83f78bd171
Successfully tagged getting-started:latest
コンテナの起動
-dオプションを用いて、detached modeで起動します。また-pオプションを用いて、ホスト側のポートとコンテナ側のポートのマッピングを設定します。今回は3000:3000と設定します。
1
% docker run -dp 3000:3000 getting-started
するとアプリが起動するのでhttp://localhost:3000にアクセスして確かめてください。
コンテナそれ自体が実行されているかを確認したい場合は、
1
2
3
% docker ps
CONTAINER ID   IMAGE             COMMAND                  CREATED          STATUS          PORTS                    NAMES
e0bfa7127923   getting-started   "docker-entrypoint.s…"   32 minutes ago   Up 32 minutes   0.0.0.0:3000->3000/tcp   vigilant_williams
起動を止めたい場合は
1
% docker stop $(docker ps -q)
2. Node.jsを活用したtodo listマネジャーアプリのアップデート
ToDo itemを入力するエリアにYou have no todo items yet! Add one above!を表示するようにupdateします。
つぎにsrc/static/js/app.jsのline 56を以下のように変更します。
-                <p className="text-center">No items yet! Add one above!</p>
+                <p className="text-center">You have no todo items yet! Add one above!</p>
つぎに、container imageをBuildし直します。
1
% docker build -t getting-started .
その後に、再びコンテナを起動します。
1
% docker run -dp 3000:3000 getting-started
3. Docker imageのシェアの方法
上で作成したDocker Imageを他人とシェアしたいとします。Docker Hubを用いたImageの共有方法を紹介します。
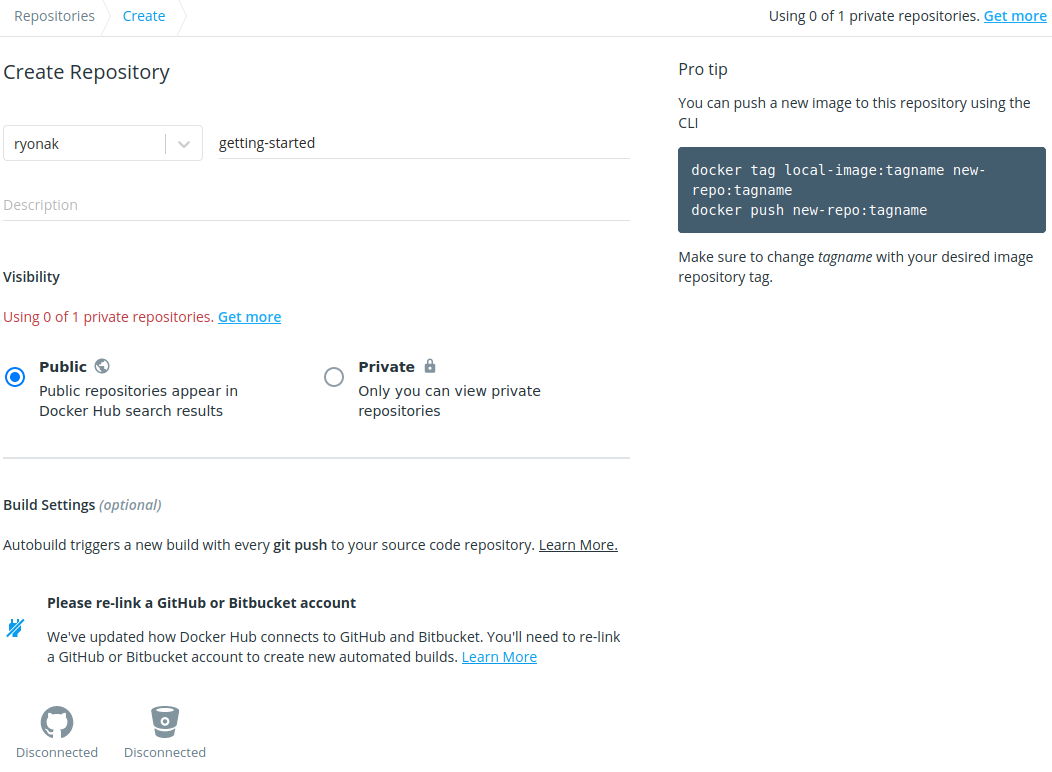
Repositoryの作成
- Docker Hubにアクセスしてログインします
- the Create Repositoryボタンをクリックします
- Repositoryの名前とDescription(任意)とVisibilityを設定します。今回は他人とシェアしたいのでVisibilityはPublicにします
- Createボタンをクリックして完了です。
Push the image
- まずdocker hubにコマンドラインからログインします
1
% docker login -u <username>
- つぎに
docker tagコマンドを用いてgetting-startedイメージをDocker Hubのレポジトリネームと一致するように変更します
1
% docker tag getting-started <username>/getting-started
- 最後にContainer imageをpushします
1
% docker push <username>/getting-started:latest
PushされたDocker imageの動作確認
Docker HubにPushされたイメージが別のインスタンスでどのように動作するか確認します。
- Play with Dockerにアクセスします
- ログインをクリックしてドロップダウンリストから
dockerを選択します。 - Docker Hubに登録したDocker imageをpullします
1
$ docker pull <username>/getting-started
- 最後にdocker runを実行して、挙動を確認します。
1
$ docker run -dp 3000:3000 <username>/getting-started
統計
Python
math
Linux
Ubuntu 20.04 LTS
Shell
English
git
方法論
Ubuntu 22.04 LTS
統計検定
競技プログラミング
フーリエ解析
前処理
SQL
coding
コミュニケーション
Network
ssh
将棋
Data visualization
Docker
Econometrics
VSCode
statistical inference
GitHub Pages
apt
development
システム管理
Coffee
cloud
数値計算
素数
Book
Font
Metrics
Poetry
Ubuntu 24.04 LTS
architecture
aws
shell
systemctl
テンプレート
データ構造
ポワソン分布
会計分析
文字コード
環境構築
論文
App
Bayesian
Dynamic Programming
Keyboard
Processing
R
Steam
filesystem
quarto
regex
(注意:GitHub Accountが必要となります)